Tuesday, October 30, 2007

I got a friendly email from someone also thinking of building an oil drum tandoor. Others might be interested in my responses to his questions

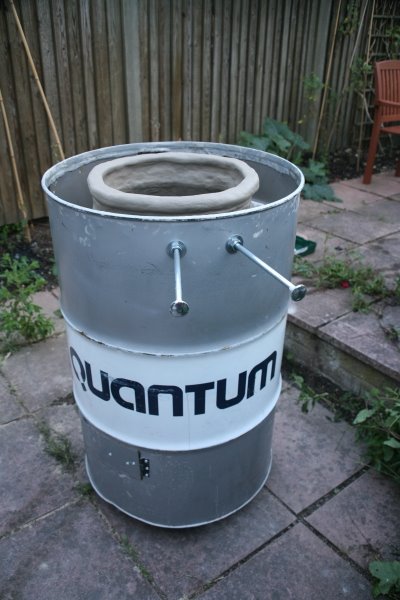
Q1. Sorry to be a pain, but I am going to make a Tandoor, and have read your Oildrum Blog with enthusiasm. I am assuming that you got your clay from Bath Pottery Supplies, but can you tell me which clay you decided on & why ?

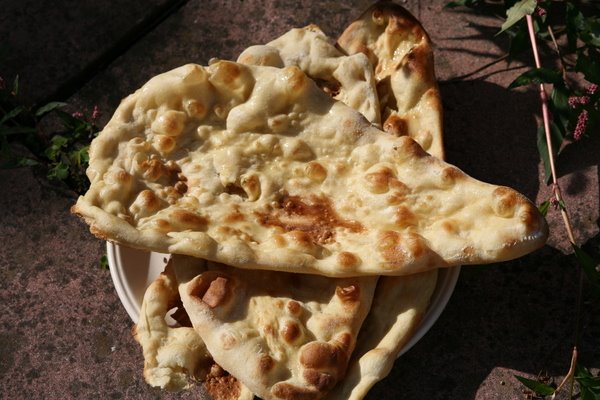
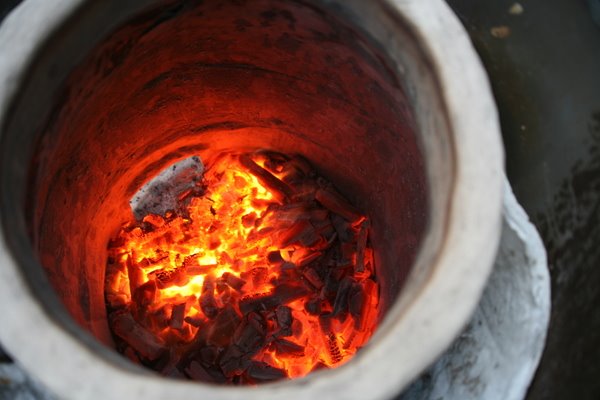
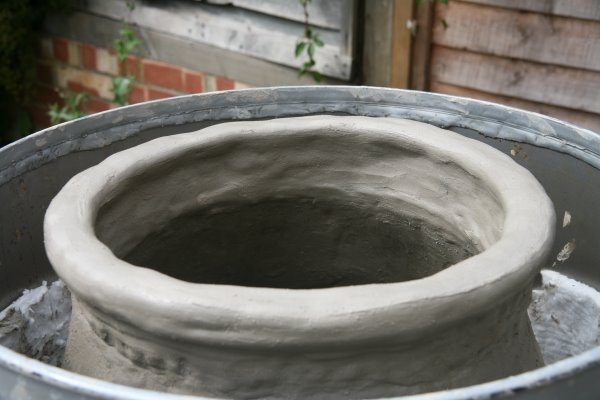
I used raku clay. I was advised that it has excellent thermal shock characteristics and hardens at a moderately low temperature.

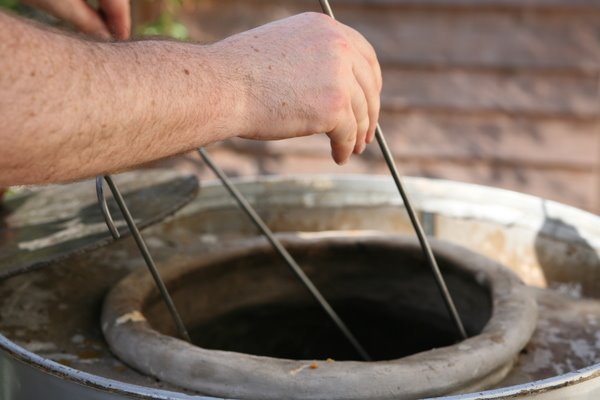
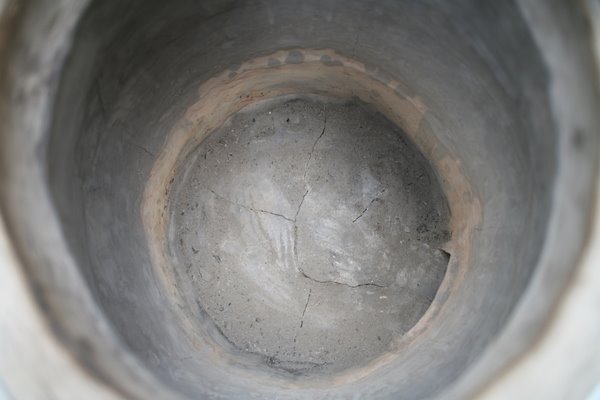
Q2. I felt that your liner should have been thicker (3 cm at least) but did it crack further ?

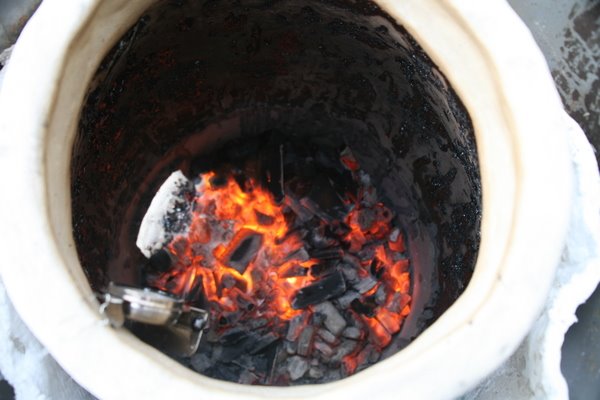
The tandoor has been extremely stable with no further signs of cracking. I
think the thickness of the clay was ok. If it is too thick the tandoor will take
longer to heat up

Q3. Hindsight is a wonderful thing, what changes, if any would you make if starting again ?

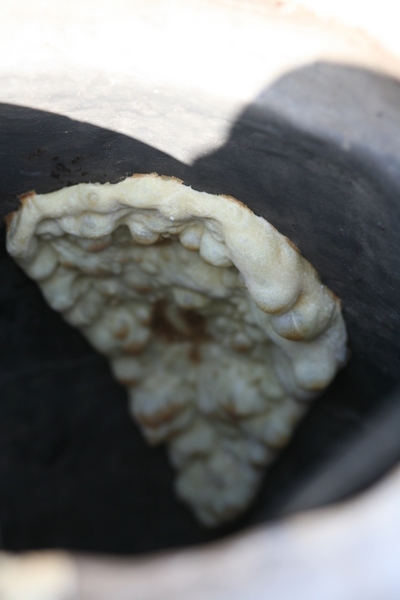
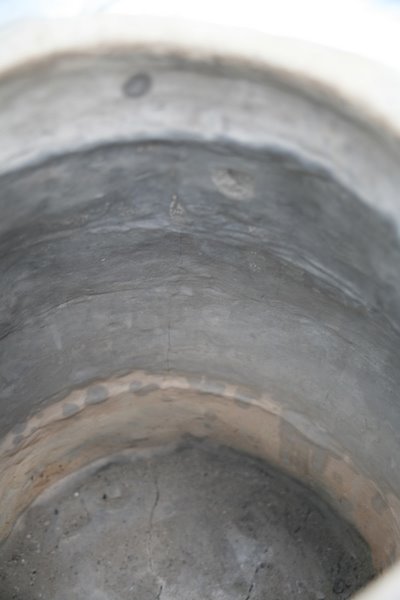
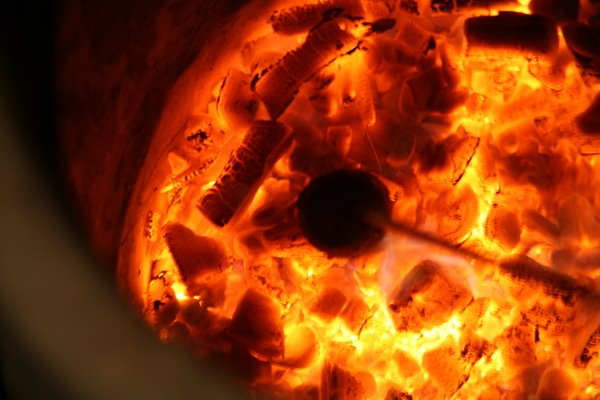
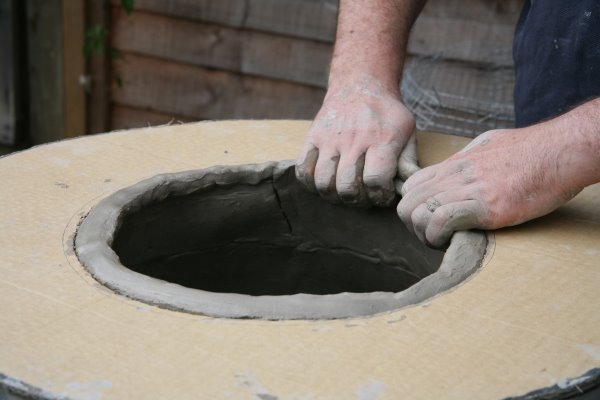
  • The joints between the clay panels are crucial. This is where
    most of the cracking came from. It is worth spending a bit of time
    practicing making high quality joins
  • I wouldn't put so much concrete in the base - it made the whole unit very
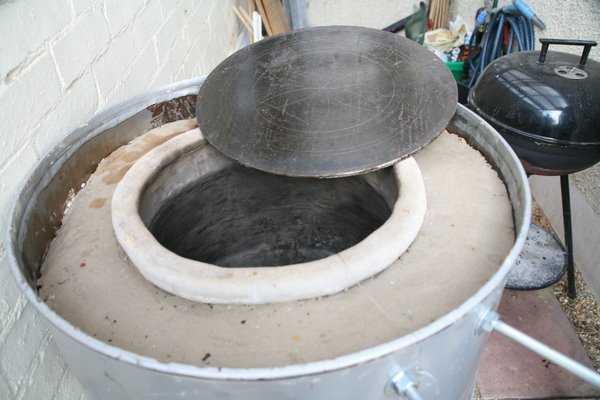
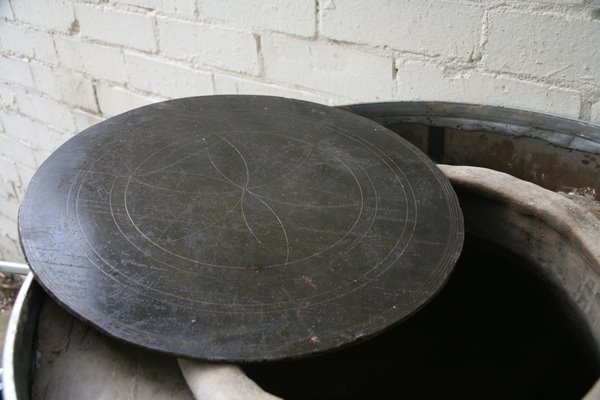
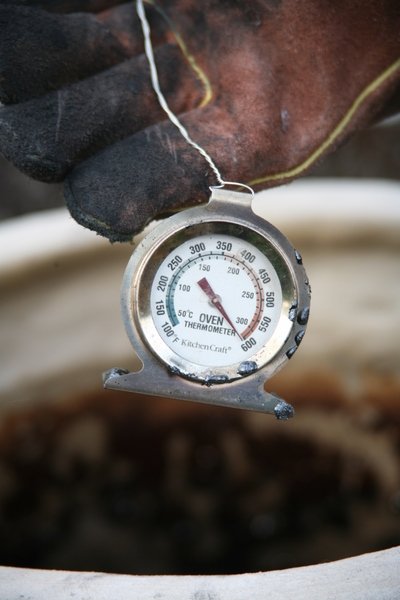
    heavy
  • Get a decent lid for it. With a lid it heats up much quicker and gives
    better control of the heat

Good luck!


Sunday, September 24, 2006

Naan lesson

The wonderful guys from the local curry house came round to show me how to use the tandoor. Making the naans was particularly illuminating, and here is what I learnt.

You need a floury surface to work on.


The dough I am using here is from Madhur Jaffrey, but there are lots of recipes around. I made a very wet dough for this set of naans - possibly too wet. Normal bready consistency I am sure would work fine.

Flatten the ball of dough with your palm. Using finger tips to push down vertically, spread it out.


Pick up the dough. The "up" side should be floury. Sprinkle the bottom with a little oil or water. Slap between both hands several times to even out the dimples and thin the dough.


With the wet side up, hold the dough on your left hand, and pull down with your right to create the classic teardrop shape.


And then firmly and confidently squidge it onto the side of the tandoor. Don't burn yourself!


With a bit of encouragement, the naan should stick to the side and quickly start to bubble up.


After a couple of minutes it is nearly ready. In this photo the bread need about another minute - until it is nicely brown all over.


Scrape and prod it off the clay.


Spread some ghee on top. Yummy!

The tandoor seems to be holding up really well. There has been no more cracking or flaking of the clay. It still takes about 90mins to heat up to cooking temperature (so not really suitable for a quick meal after work) and uses about 3-4kg of charcoal each time...and I should probably be running it even hotter than I am.

That's all for now!

Friday, September 01, 2006

More cooking

Another big tandoor feast yesterday.

Starring from left to right: naan, king prawn with potato and corn seekh, home-made paneer and cherry tomatos, aubergine tikka, lamb seekhs and the ubiquitous tandoori chicken.


Proof - as if it were needed - that a 2kg chicken can be suspended from a single skewer. It all got a bit difficult once the chicken was cooked as the meat lost its grip on the metal.

Some of the various foodstuffs waiting to go in the tandoor.


Naans worked even better this team - really puffy.

Tandoori king prawns were brilliant again. The potato and corn seekhs were a little undercooked, but we had to rescue them before they fell of the skewer.


Homemade paneer and cherry tomatoes were a complete success. I've not made cheese before so I was very pleased. Marinaded in mustard oil with coriander and a little crushed cumin, garnished with a little black salt and cumin.

And that chicken again, none the worse for a little contact with charcoal. You can see how juicy it is from the liquid on the plate...

Wednesday, August 30, 2006

Tandoori King Prawn

This is our first tandoori king prawn effort from earlier in the week.

Here the tiger prawns are deveined and butterflied.


After rubbing with gram flour and washing, the prawns go in the yoghurt marinade.


Here we are drying the yoghurt marinade.


Into the tandoor. The lid should be partly on when cooking and enough air for the coals to glow red.


...and onto the plate.


Delicious! The recipe suggests that the prawns can also be covered with batter on top of the marinade to stay even juicier...something to try next maybe?
It Cooks!

Firstly I'd like to give my thanks to Monty's Northfields for letting me look round their kitchen and ask lots of questions.

Some friends came round so we knocked up this spread. From left to right: naans, coriander chutney (green), tandoori king prawn, tandoori khatta masala (grey powder), roast peppers, tandoori chicken, lamb seekh, sag paneer.


Naans were very good indeed. They really do just stick inside the tandoor until they are cooked. Montys tell me they use special naan flour, which I haven't seen anywhere else. Chappati flour might be worth a try - these are using organic strong white flour.


Here you can see me using the naan skewers to pull the bread out the oven. The bread usually comes off easily once it is cooked.


Tandoori king prawn were fabulous.


Whole tandoori chicken was succulent and sweet. Cooked in two 15min blasts in the tandoor. This massive bird (nearly 2kg) was suspended from a single skewer "woven" along the backbone. As long as the skewer stays at an angle, the chicken stays in place!


Here you can see the chicken during the second part of the seven hour marinading. There is a spare chicken there for our next big session later this week.


Paneer was cooked in the tandoor and then panfried with spinach leaves and some spices. Delicious.


For our first attempt this was an absolutely amazingly good meal! The heat maybe should have been higher for the naan and the prawns, and the chicken did hit the charcoal at one point. Other than that - perfect.
It is finished (more or less)

A bit of chicken wire and two 2kg tubs of fire cement and the top of the tandoor is starting to look presentable. I'll probably add a third tub to smooth off the edges. I'll eventually get round to painting it and maybe putting some mosaic on the fire cement round the top.


The lid comes from Popat Store on Ealing Road in Alperton. It is made from cast iron so its pretty heavy. They also have a nice line in skewers (seekh).

Here you can see my new skewer collection. From left to right: 6 round skewers, 2 naan skewers, 2 square skewers, 2 home made skewers and the skewer from the local curry house.

Wednesday, August 23, 2006

Review of the Tandoor firing.

Phew. The Tandoor was still warm the next morning. And still standing in one piece!

The clay definitely seems solid enough to cook in. You can see that the base is cracked. I'm pretty sure this is because the hot charcoal was sitting directly on the wet clay. It would have been better to use fire bricks for the base as they are already "cooked" and can take the direct heat from the charcoal at the start of the firing. It will still be fine for cooking and the ashes help fill the gaps.


There are some vertical hairline fractures in the pot. I should have massaged the pieces into place more diligently. I think the wet clay I used to pad out the gaps didn't dry properly and this caused the cracking. It should still be fine for cooking though.


The two large cracks on the outside of the pot in yesterday's photo seem to have stabilised. They are probably less than a quarter of the pot thickness. The large cracks look like a problem to do with the clay taking on the shape I wanted. I think maybe either there were air bubbles in the clay, it didn't dry enough or I should have made sure the clay was fully bashed into the curved shape. I think I might fill them with fire cement to ensure there is plenty of strength.

It's worth noting that the pot has shrunk quite a bit during firing. It maybe sits half an inch below the level of the oil drum now. Not a problem, but I'm glad I made it a bit too big in the wet clay.

I think a lot of these problems could have been avoided if I had used fire bricks in the base, worked the clay in the vertical joints more and dried the pot for a week or two before firing.

The final learning is that its not worth doing the coating with jaggery to go up to these very high temperatures. It produced a lot of acrid smoke, carbonised and quite a bit of it started burning. I think it would be better to fire the pot and then do a second cooler firing with the jaggery. At about 200°C the jaggery dries quickly and peels off the clay, leaving a thin sugary layer on the clay - this has to be the right process for lining the pot.

All that said, the pot is definitely good for cooking, and I'm confident its structure will now be stable up to the highest cooking temperatures. I need to work out how to cover the insulation in the top of the pot - fire cement is likely to be the right answer here too.


And of course, I now need to get cooking and for that I need some drier weather again!

Monday, August 21, 2006

Day 10, part 3. Take it to the max

At about eight hours some major cracks appeared near the top of the pot. There had also been a lot of steam coming from the insulation around the pot so I had taken all the accessible insulation out. It looks like the steam came from the pot drying out. The insulation was so effective, the steam was condensing on the inside of the oil drum.


The good news was that the coals were now very hot. I heated some metal rods and hammered them to form traditional shaped hooked tandoor skewers.


At nine hours the fire was really roaring. Very uncomfortable to get close. The clay wasn't glowing, so we must have been somewhere between 300°C and 700°C. It certainly felt and looked entirely different from 300°C.


To get it hotter I fired a paint stripping gun into the air vent.


At ten hours there is a raging inferno with about 4kg of charcoal in the tandoor. The oven thermometer is sitting outside the tandoor, inside the oil drum, and registering about 100°C.


We decided to bake a potato in the tandoor. It took about 10mins and was delicious, if a little burnt on the outside.


I'm writing the blog now at 14 hours. The interior of the tandoor is back down to a much more comfortable 300°C. I'll probably put a metal lid back on in about an hour or so and then see how its looking in the morning. We've burnt about 14kg of charcoal today.
Day 10, part 2. Objective: Room temperature to 300C

Hour zero. This is the start of the charcoal fire. I read up about firing clay, and the first crucial stage is around 80°C-100°C to dry out the clay. I decided we would need to stay at that temperature for several hours.


This is the fire three hours later. I've built it up a little. The internal temperature was still about 100°c at this stage. Over the first four or five hours we had a lot of problems with rain. There was a lot of standing round outside in the rain hoping the umbrella didn't melt.


At six hours we started to build the fire up. You can see that there were a few hairline cracks forming in the clay. The base was really quite cracked up, but the cracks filled with ashes.


The higher temperature at six hours makes a big difference to the jaggery. It has hardened and started to peel off the clay. I think it has left a thin layer of sugar - the seasoning.


And at about eight hours the fire is substantially bigger...


And shortly after that we reach the maximum of my oven thermometer.


Day 10 part 1. Objective: Line tandoor with jaggery.

Started work today by cutting up the jaggery. That is a 1kg block you can see in the picture. The texture is a bit like fudge - it cuts up pretty easily.

The jaggery has a lot of water in it so it melts easily.


I smeared the jaggery on the inside of the tandoor using a wooden spoon and a spatula. It was very diificult to get a smooth surface as the jaggery became very sticky when the clay cooled it down. I was able to fix this later once the fire was going.

Sunday, August 20, 2006

Day 9. Objective: Finish clay construction.

We got to the top!

In this photo you can see me using the cardboard template to start shaping the rim. The final slabs of clay were 10cm wide and protruded by about 5cm giving nearly enough clay to form a rim.

And the finished pot!


I've done a little diagram below to show roughly what shape a rim should be. I didn't quite get this to begin with, so I had to do a lot of moulding backwards and forwards until my wife bought a sense of perspective. The rim is just a reinforcement of the wall to give it some extra strength, as shown by the grey shaded piece. The rim I constructed added a flat piece on top, but the important element is the shaded section which sits on top of the clay walls.

On closer inspection, the tandoor book shows pictures of the rim being built exactly like the diagram shows.

I'm very pleased with the quality of the work, even if the inside of the pot won't be winning any construction awards. I've still got the last piece of pottery I did before this - a hideous, rubbish, mishapen "cup" I made when I was about 13. This is so much better.


The rim of the pot sat about 1cm above the top of the oil drum when I had finished. Overnight it seems to have settled to the same height. I've also added two coach bolts to hang the tandoor skewers on while the food is resting.


To celebrate this success, I went with my wife and parents to our local curry restaurant. We all ordered tandoori food and probably spent as much time looking at the size of the skewer holes and the texture of the marinade as eating. The restaurant staff were absolutely amazed that I was building a tandoor oven, and gave me some useful contacts for catering equipment and a free tandoor skewer! They also invited me back tomorrow (or next week) for a marinade and tandoor lesson and they seem genuinely excited by this project!

The next big stage is firing. The pot will have been air drying for about 36 hours since we last did any work on it. We need to "season" the inside surface with jaggery^ and then gently build up the heat over several hours. The jaggery is solidified sugar cane sap and tastes like a cross between fudge and molasses. I hope I've got enough because I keep nibbling at it.

I've got two big bags of charcoal but no thermometer capable of going up to anything like 1000°C. Charcoal was original used before the invention of coke to smelt iron from ore, which needs 1530°C, so getting the temperatures we need is theoretically possible. I'm planning to use a chart of glowing metal colours which suggests that the firing temperature will have the (inside of the) pot glowing between dark orange and white hot.