Build day 2. Objective: Cut the air vent, attach castors, fill base with concrete.
Right. Wasted loads of time this morning cutting the hole for the airvent with a junior hacksaw blade. I tried filing down the rough edges and that was going too slow as well.
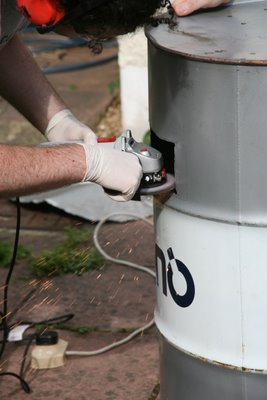
I am now the proud owner of an angle grinder. Suprisingly cheap from the local DIY superstore and its made very quick work of finishing the air vent. Final dimensions are about 10cm x 20cm which should be big enough to sweep the ashes and to let me put my arm in for any interior construction work.
 The castors were pretty straightforward to attach using some large locking nuts and bolts. Be careful to ensure the castors can rotate all the way round and that the castor brakes don't foul the edge of the oil drum.
 My Dad popped round with 25kg each of dry mortar and aggregate and we mixed it up with some water to fill the base. The mixture came to about 3-4cm short of the bottom of the air vent to allow for the insulation and clay. My Dad's top tip is to add a dash of detergent to the water - he thinks it helps the concrete take the form of the barrel.
Tools used today
protective goggles
ear defenders
protective gloves
washing-up/latex gloves
Drill + variety of HSS bits
Junior hacksaw + lots of blades
Angle grinder + 115mm grinding plate
1 half-round File
Emery sponge
3 x 80mm swivel nylon casters with brake
12 bolts & stainless steel nylon lock nuts (we used M8)
set of spanners and sockets
25kg General Purpose Mortar
25kg 10mm Gravel
water
A dash of detergent
trowel and/or shovel
sheet of wood + newspaper for mixing (or polythene sheet)
scrap wood (for tamping)
Right. Wasted loads of time this morning cutting the hole for the airvent with a junior hacksaw blade. I tried filing down the rough edges and that was going too slow as well.
I am now the proud owner of an angle grinder. Suprisingly cheap from the local DIY superstore and its made very quick work of finishing the air vent. Final dimensions are about 10cm x 20cm which should be big enough to sweep the ashes and to let me put my arm in for any interior construction work.
 The castors were pretty straightforward to attach using some large locking nuts and bolts. Be careful to ensure the castors can rotate all the way round and that the castor brakes don't foul the edge of the oil drum.
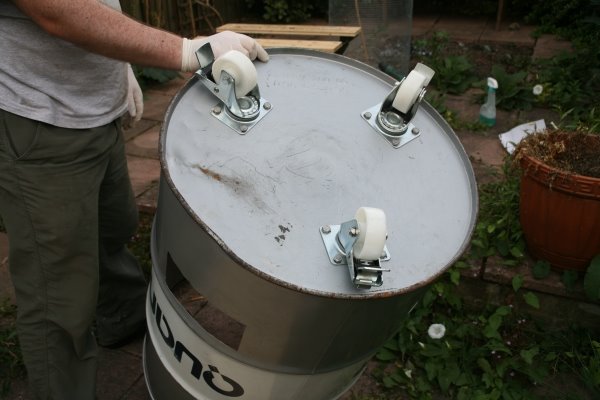 My Dad popped round with 25kg each of dry mortar and aggregate and we mixed it up with some water to fill the base. The mixture came to about 3-4cm short of the bottom of the air vent to allow for the insulation and clay. My Dad's top tip is to add a dash of detergent to the water - he thinks it helps the concrete take the form of the barrel.
Tools used today
protective goggles
ear defenders
protective gloves
washing-up/latex gloves
Drill + variety of HSS bits
Junior hacksaw + lots of blades
Angle grinder + 115mm grinding plate
1 half-round File
Emery sponge
3 x 80mm swivel nylon casters with brake
12 bolts & stainless steel nylon lock nuts (we used M8)
set of spanners and sockets
25kg General Purpose Mortar
25kg 10mm Gravel
water
A dash of detergent
trowel and/or shovel
sheet of wood + newspaper for mixing (or polythene sheet)
scrap wood (for tamping)
posted by bigbrowncow at 9:46 am
![]()

0 Comments:
Post a Comment
<< Home